What Comes First: The Footage or The Script?
When it comes to creating voiceover videos: what comes first — the footage or the script? Beneath that question is usually a more important one: why do voiceover videos feel so difficult to make?
Voiceover content is one of the most time-intensive formats out there. It requires deep reflection, planning, filming, and editing, all working together. Without a clear process, that complexity can make people feel overwhelmed. When content feels overwhelming, it often leads to procrastination.
The real goal, then, is not just to make better voiceover videos. The goal is to create a system that reduces mental fatigue, removes unnecessary decision-making, and turns a difficult process into one that feels manageable over time.
This is the system that makes voiceover videos easier to create and more sustainable to maintain.
Step 1: Write the Script First
For story-based voiceovers, the script should come first.
Casual posts can sometimes be created off the cuff, but reflective or narrative voiceovers require a script that gives the video meaning and direction. It defines what the story is about, what emotion the viewer should feel, and what kind of visual scenes are needed to support the message.
Rather than filming random clips and trying to make them fit later, starting with a script gives filming a purpose. The written story becomes a guide that determines what footage is necessary.
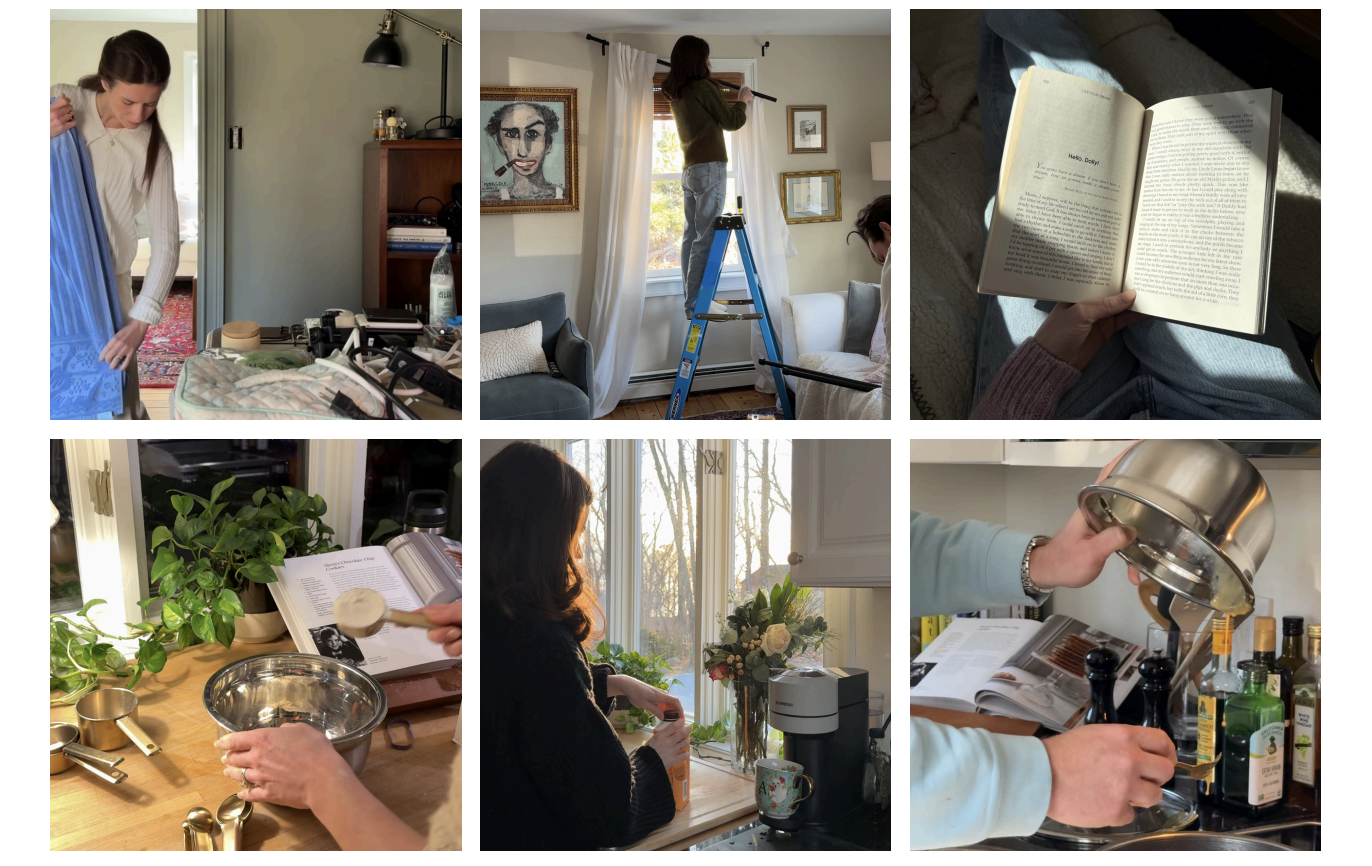
For example, a script about settling into a new home or entering a slower season of life naturally points toward specific visual moments:
time spent at home
small acts of care like painting or organizing
daily rituals such as making coffee
quiet scenes like opening a window or arranging a room.
In this way, the script creates the scenes before any filming begins.

Step 2: Capture Footage With Intention
Once the script is written, the next step is collecting footage.
Voiceover videos work best when footage is gathered gradually rather than rushed into a single filming session. This allows real moments to be captured naturally as they happen. The most effective clips usually contain motion and follow an action from beginning to end.
Examples include:
pouring coffee
putting sheets on a bed
talking with a friend
fixing a car or bike
opening a window
walking into a room
picking up a paintbrush.
These kinds of movements hold attention because they show change and progression rather than stillness.
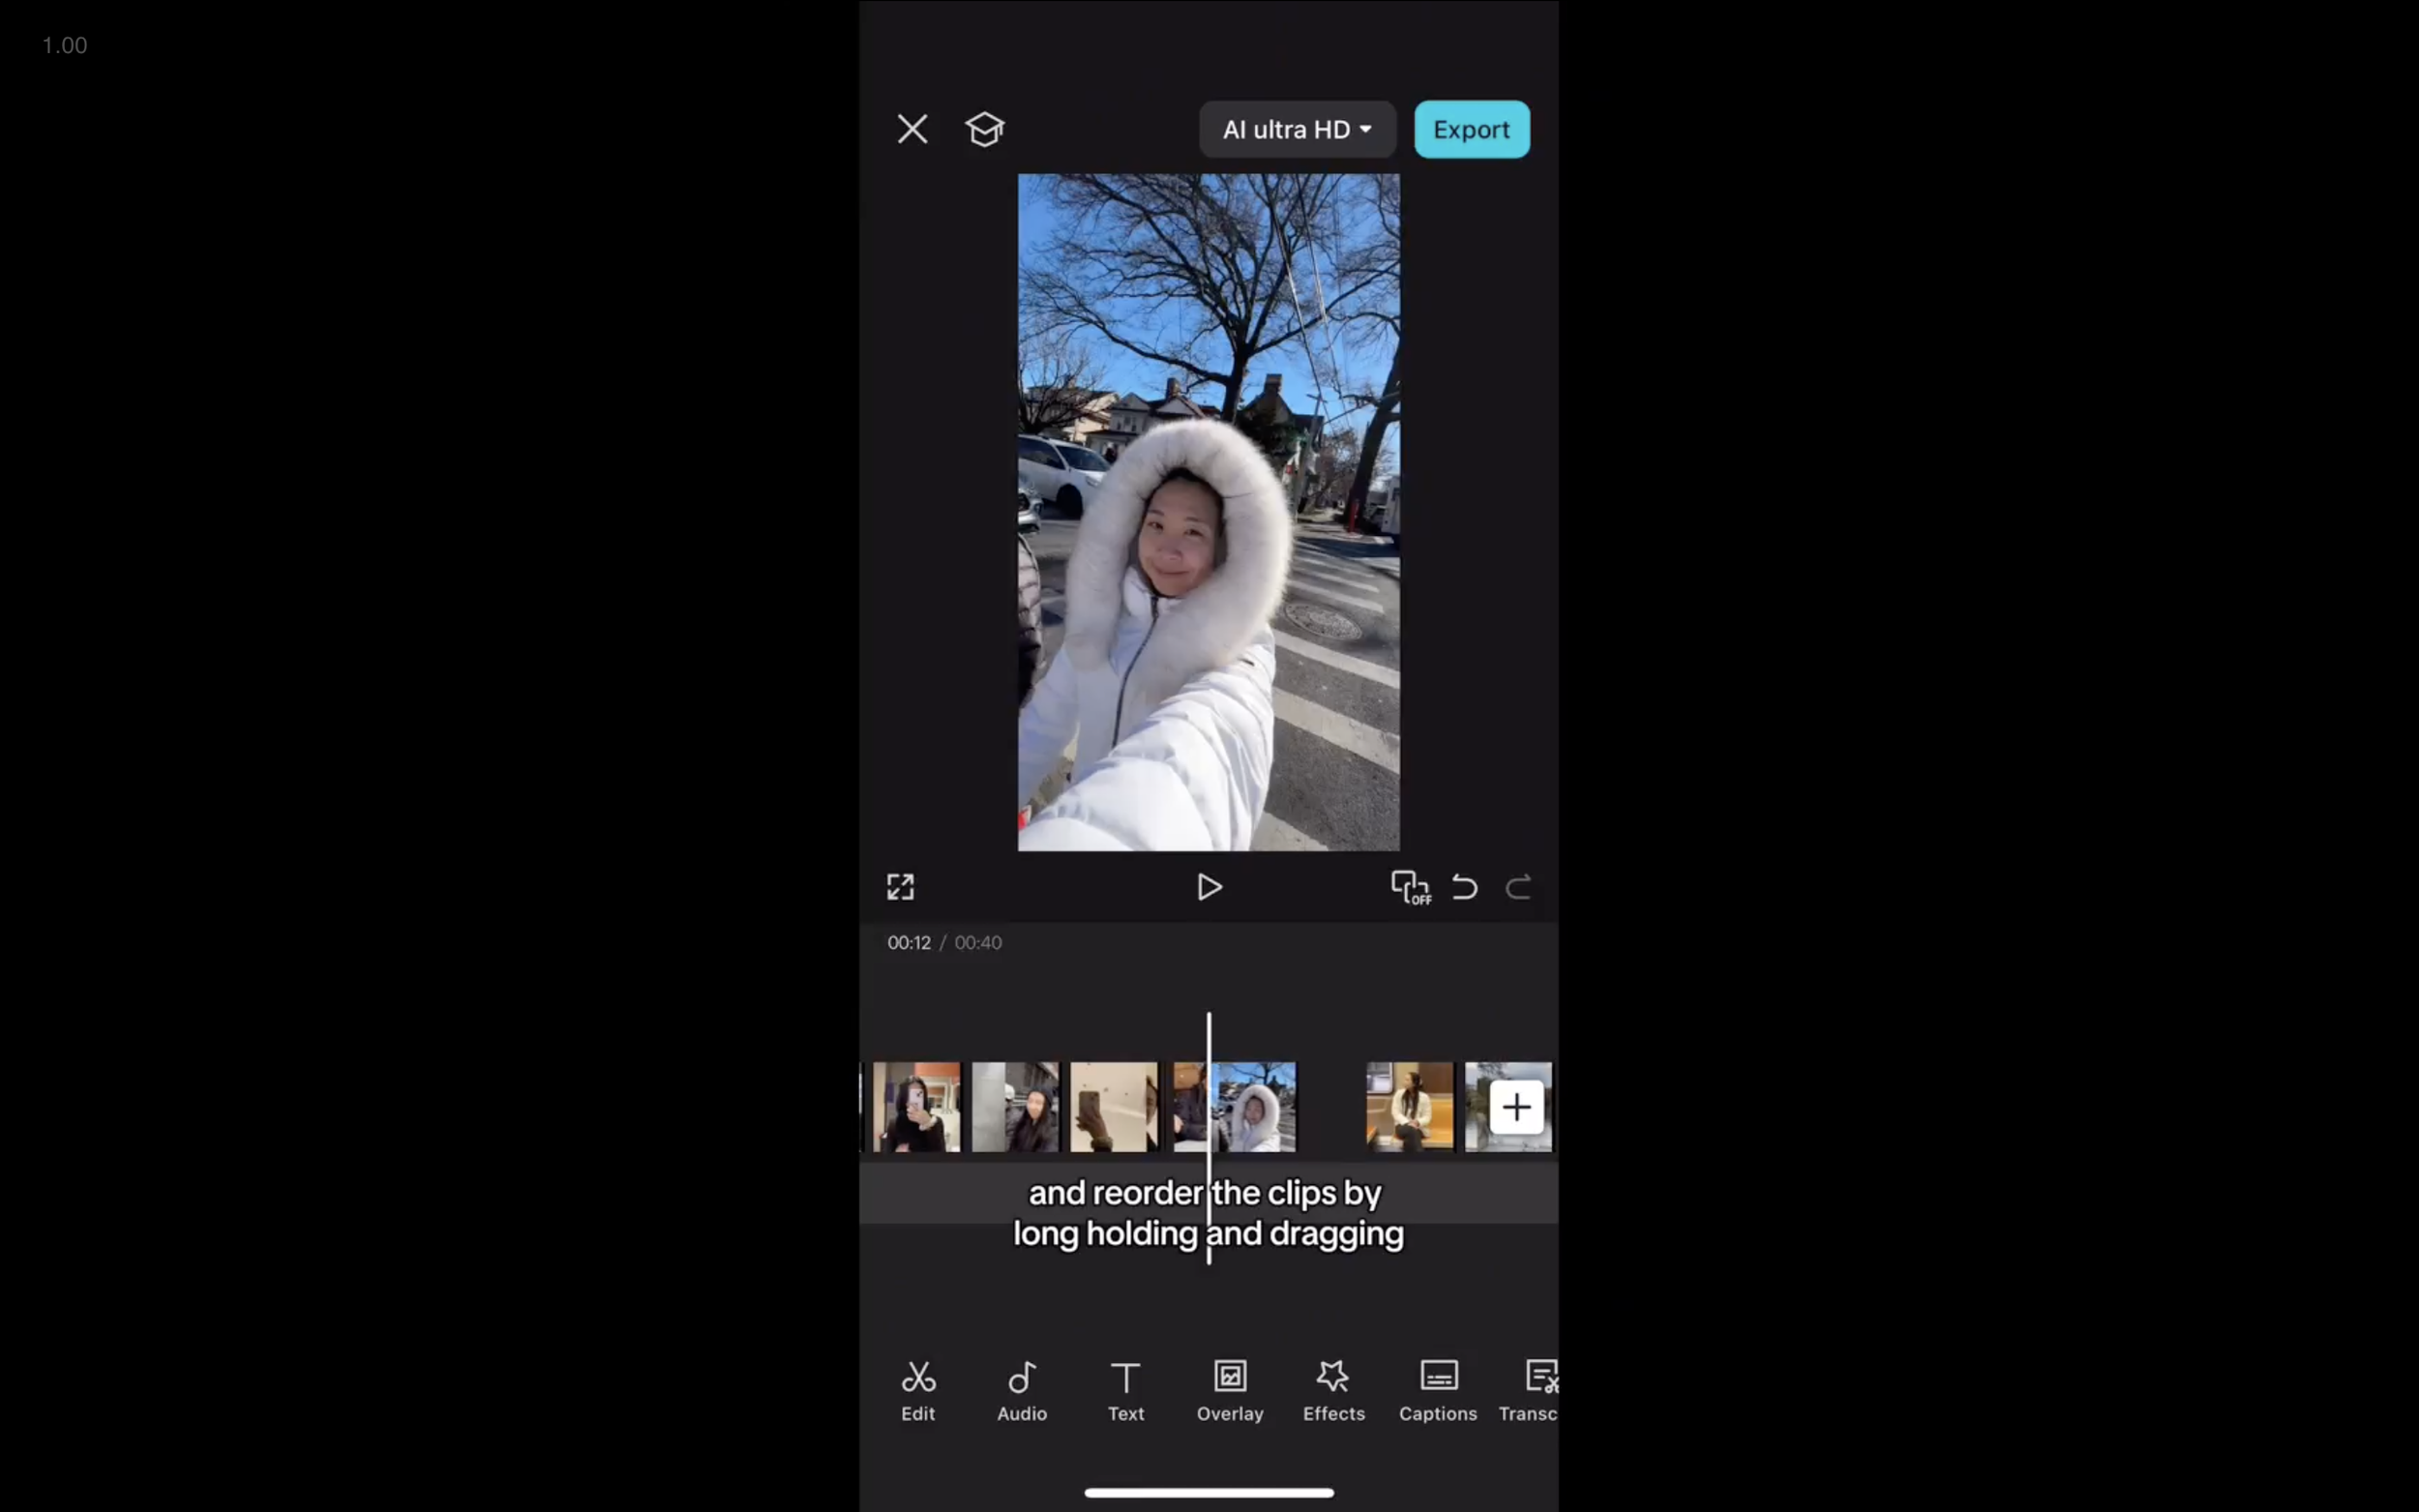
Step 3: Create a Rough Edit of the Footage
Before recording the voiceover, it is helpful to assemble a rough visual edit.
This step involves placing all collected clips into an editing app, trimming them down, and selecting the most visually engaging moments. At this stage, nothing is synced to audio yet. The focus is simply on shaping the visual story and removing anything that feels static or unnecessary.
This early edit creates rhythm and flow before the voiceover is added. Seeing the sequence of clips makes it easier to understand the pacing of the video and prepares the footage for the final step of synchronization.
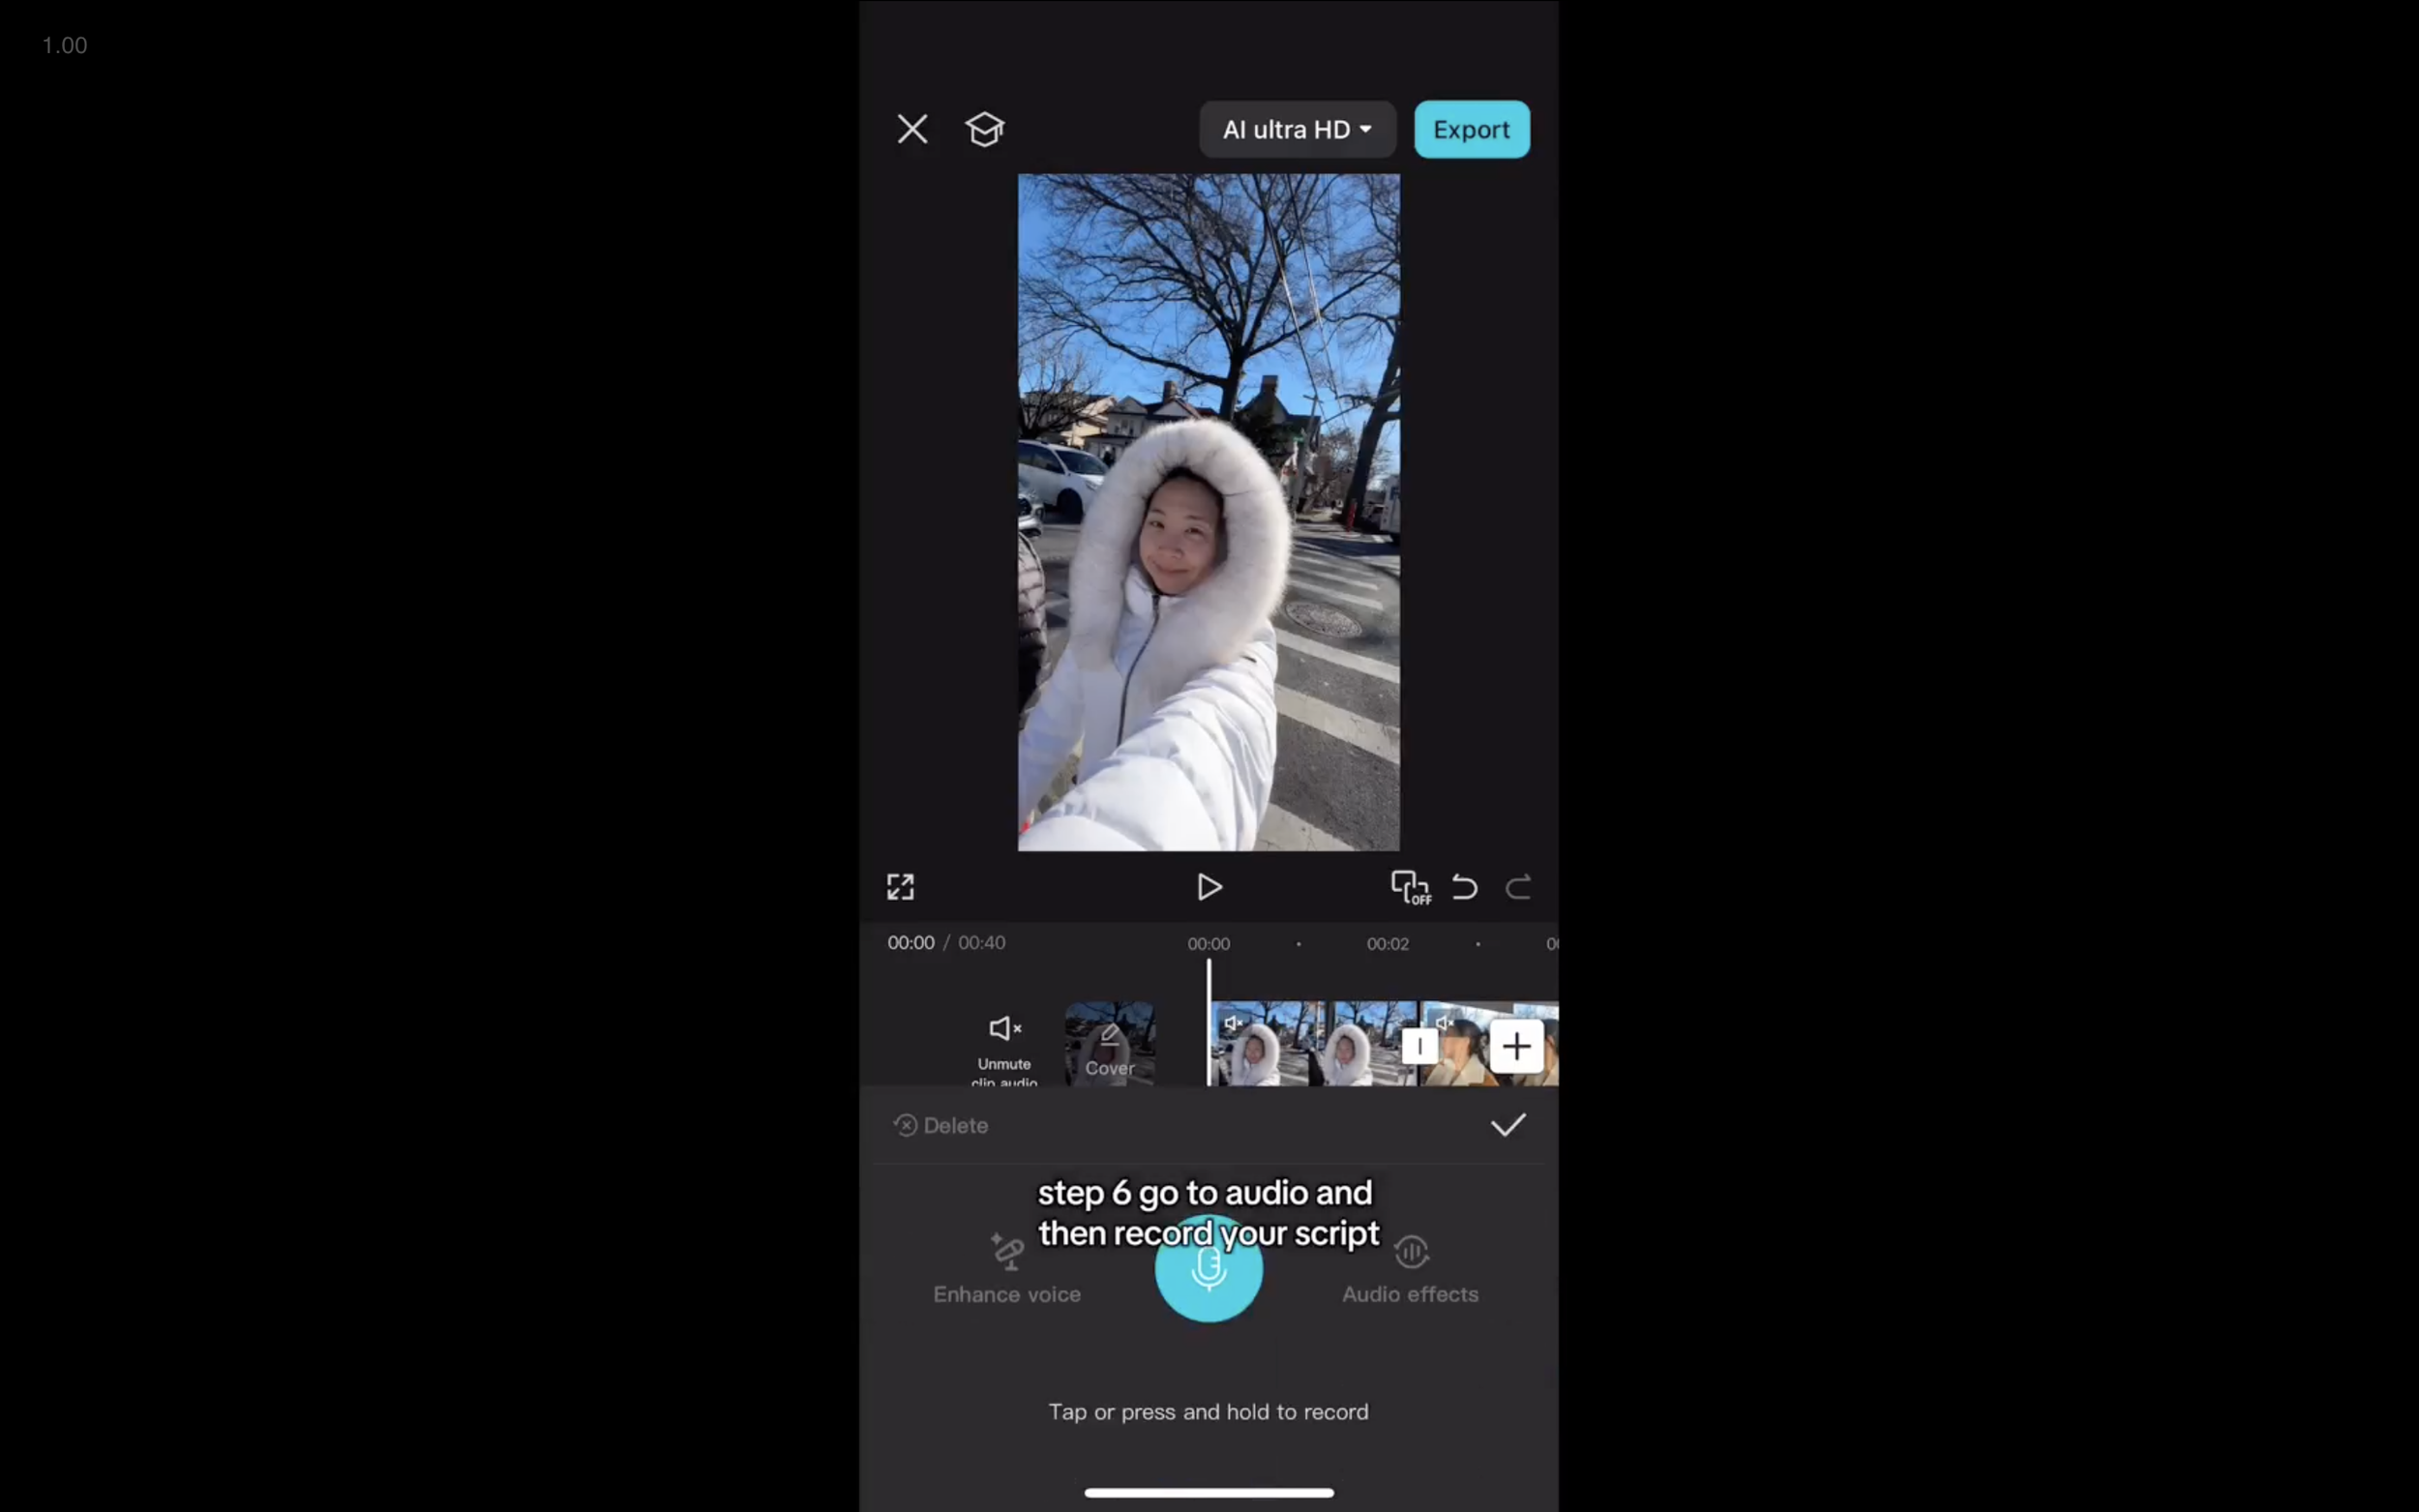
Step 4: Record the Voiceover From a Finished Script
The script should already be edited and finalized before recording begins.
This is not the stage to rewrite or rethink the message. The script is the foundation of the entire video, and everything else is built on top of it. Recording from a finished script eliminates uncertainty about what to say, how long the video should be, and what emotional tone to use.
When the words are settled ahead of time, the recording process becomes straightforward rather than stressful.
Step 5: Final Edit
In the final editing stage, the footage is matched to the voiceover as closely as possible.
Each sentence or phrase is ideally paired with a new clip, creating visual movement throughout the video.
Short clips work best, typically lasting between half a second and two seconds.
Faster pacing helps hold attention and keeps the story feeling alive rather than static.
This step often takes the most time, but it is also where the video becomes the most compelling. The relationship between sound and image is what transforms individual clips into a complete story.

Why This Voiceover System Works
This system works because it removes guesswork from every stage of creation.
Instead of asking:
What should be filmed?
What should be said?
Where should the process begin?
The order is already defined:
Write the script.
Capture the footage.
Create a rough edit.
Record the voiceover.
Complete the final edit.
Over time, this approach also allows creators to build a library of footage. When clips are collected consistently, future voiceovers become an act of assembling existing material rather than inventing everything from scratch. That shift is what makes voiceover videos sustainable rather than overwhelming.
Create Voiceover Videos With Structure and Support
Learn This Process Inside Personal Brand Accelerator
This is the formula we teach inside Personal Brand Accelerator (PBA), where creators learn how to turn their ideas and everyday moments into clear, story-driven content that gets results.
Inside PBA, members learn how to:
write scripts that give their content direction
capture intentional footage that supports their message
and build repeatable systems for creating videos that get seen by millions
Instead of guessing what to post or starting from scratch each time, the focus is on developing a creative process that removes overwhelm and builds confidence over time.
For anyone who wants to make voiceover videos and great content in general, feel more structured, more intentional, and easier to return to consistently, PBA provides the tools, guidance, and community to do exactly that.